Why Maintenance Pages Matter ?
Maintenance pages ensure a smooth user experience when your infrastructure undergoes scaling, migration, or system upgrades. Instead of users facing downtime errors, a clear and branded maintenance page communicates control.
Step 1: Set Up Maintenance Page with Cloudflare
We'll use Cloudflare Workers to intercept all traffic and serve a static maintenance page instantly.
Create a new worker by logging into Cloudflare Dashboard → Workers → Create a Service → Manual Setup.
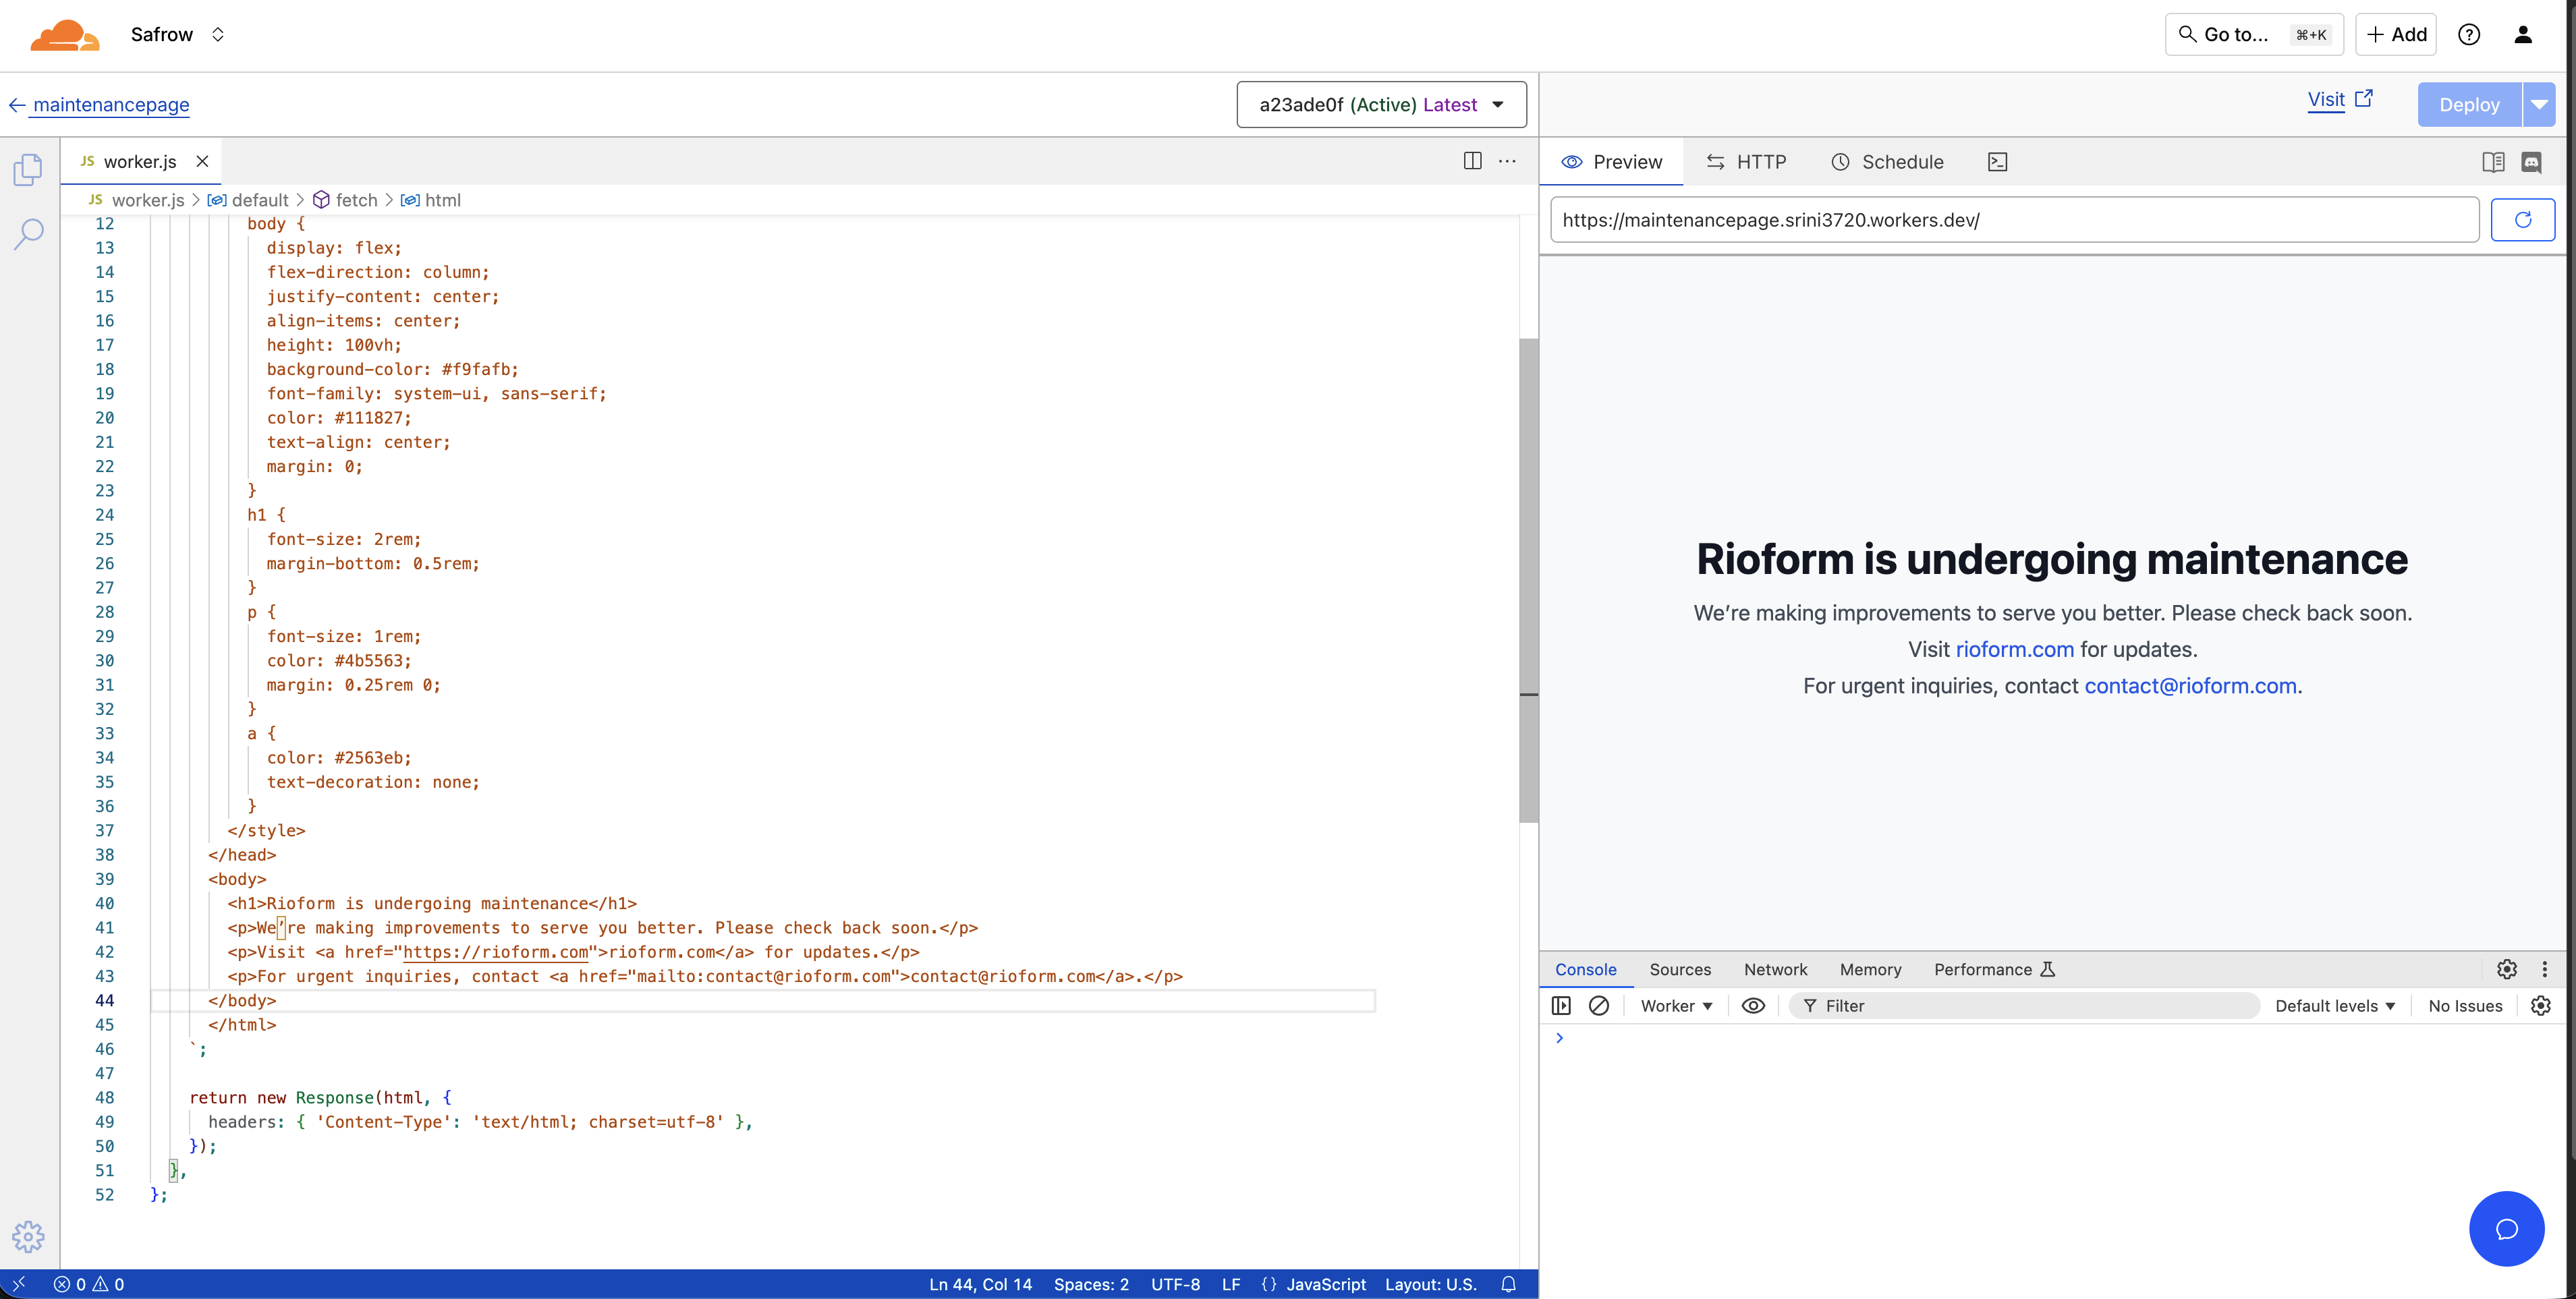
Then copy and paste the code below into the editor.
Worker Code Example
export default {
  async fetch(request, env, ctx) {

    const html = `
      <!DOCTYPE html>
      <html lang="en">
      <head>
        <meta charset="UTF-8" />
        <meta name="viewport" content="width=device-width, initial-scale=1.0" />
        <title>Rioform | Maintenance</title>
        <style>
          body {
            display: flex;
            flex-direction: column;
            justify-content: center;
            align-items: center;
            height: 100vh;
            background-color: #f9fafb;
            font-family: system-ui, sans-serif;
            color: #111827;
            text-align: center;
            margin: 0;
          }
          h1 {
            font-size: 2rem;
            margin-bottom: 0.5rem;
          }
          p {
            font-size: 1rem;
            color: #4b5563;
            margin: 0.25rem 0;
          }
          a {
            color: #2563eb;
            text-decoration: none;
          }
        </style>
      </head>
      <body>
        <h1>Rioform is undergoing maintenance</h1>
        <p>We’re making improvements to serve you better. Please check back soon.</p>
        <p>Visit <a href="https://rioform.com">rioform.com</a> for updates.</p>
        <p>For urgent inquiries, contact <a href="mailto:contact@rioform.com">contact@rioform.com</a>.</p>
      </body>
      </html>
    `;

    return new Response(html, {
      headers: { 'Content-Type': 'text/html; charset=utf-8' },
    });
  },
};
Select Preview to verify that the maintenance page renders correctly.
Once confirmed, deploy the Worker and map it to a dedicated subdomain, such as maintain.rioform.com.
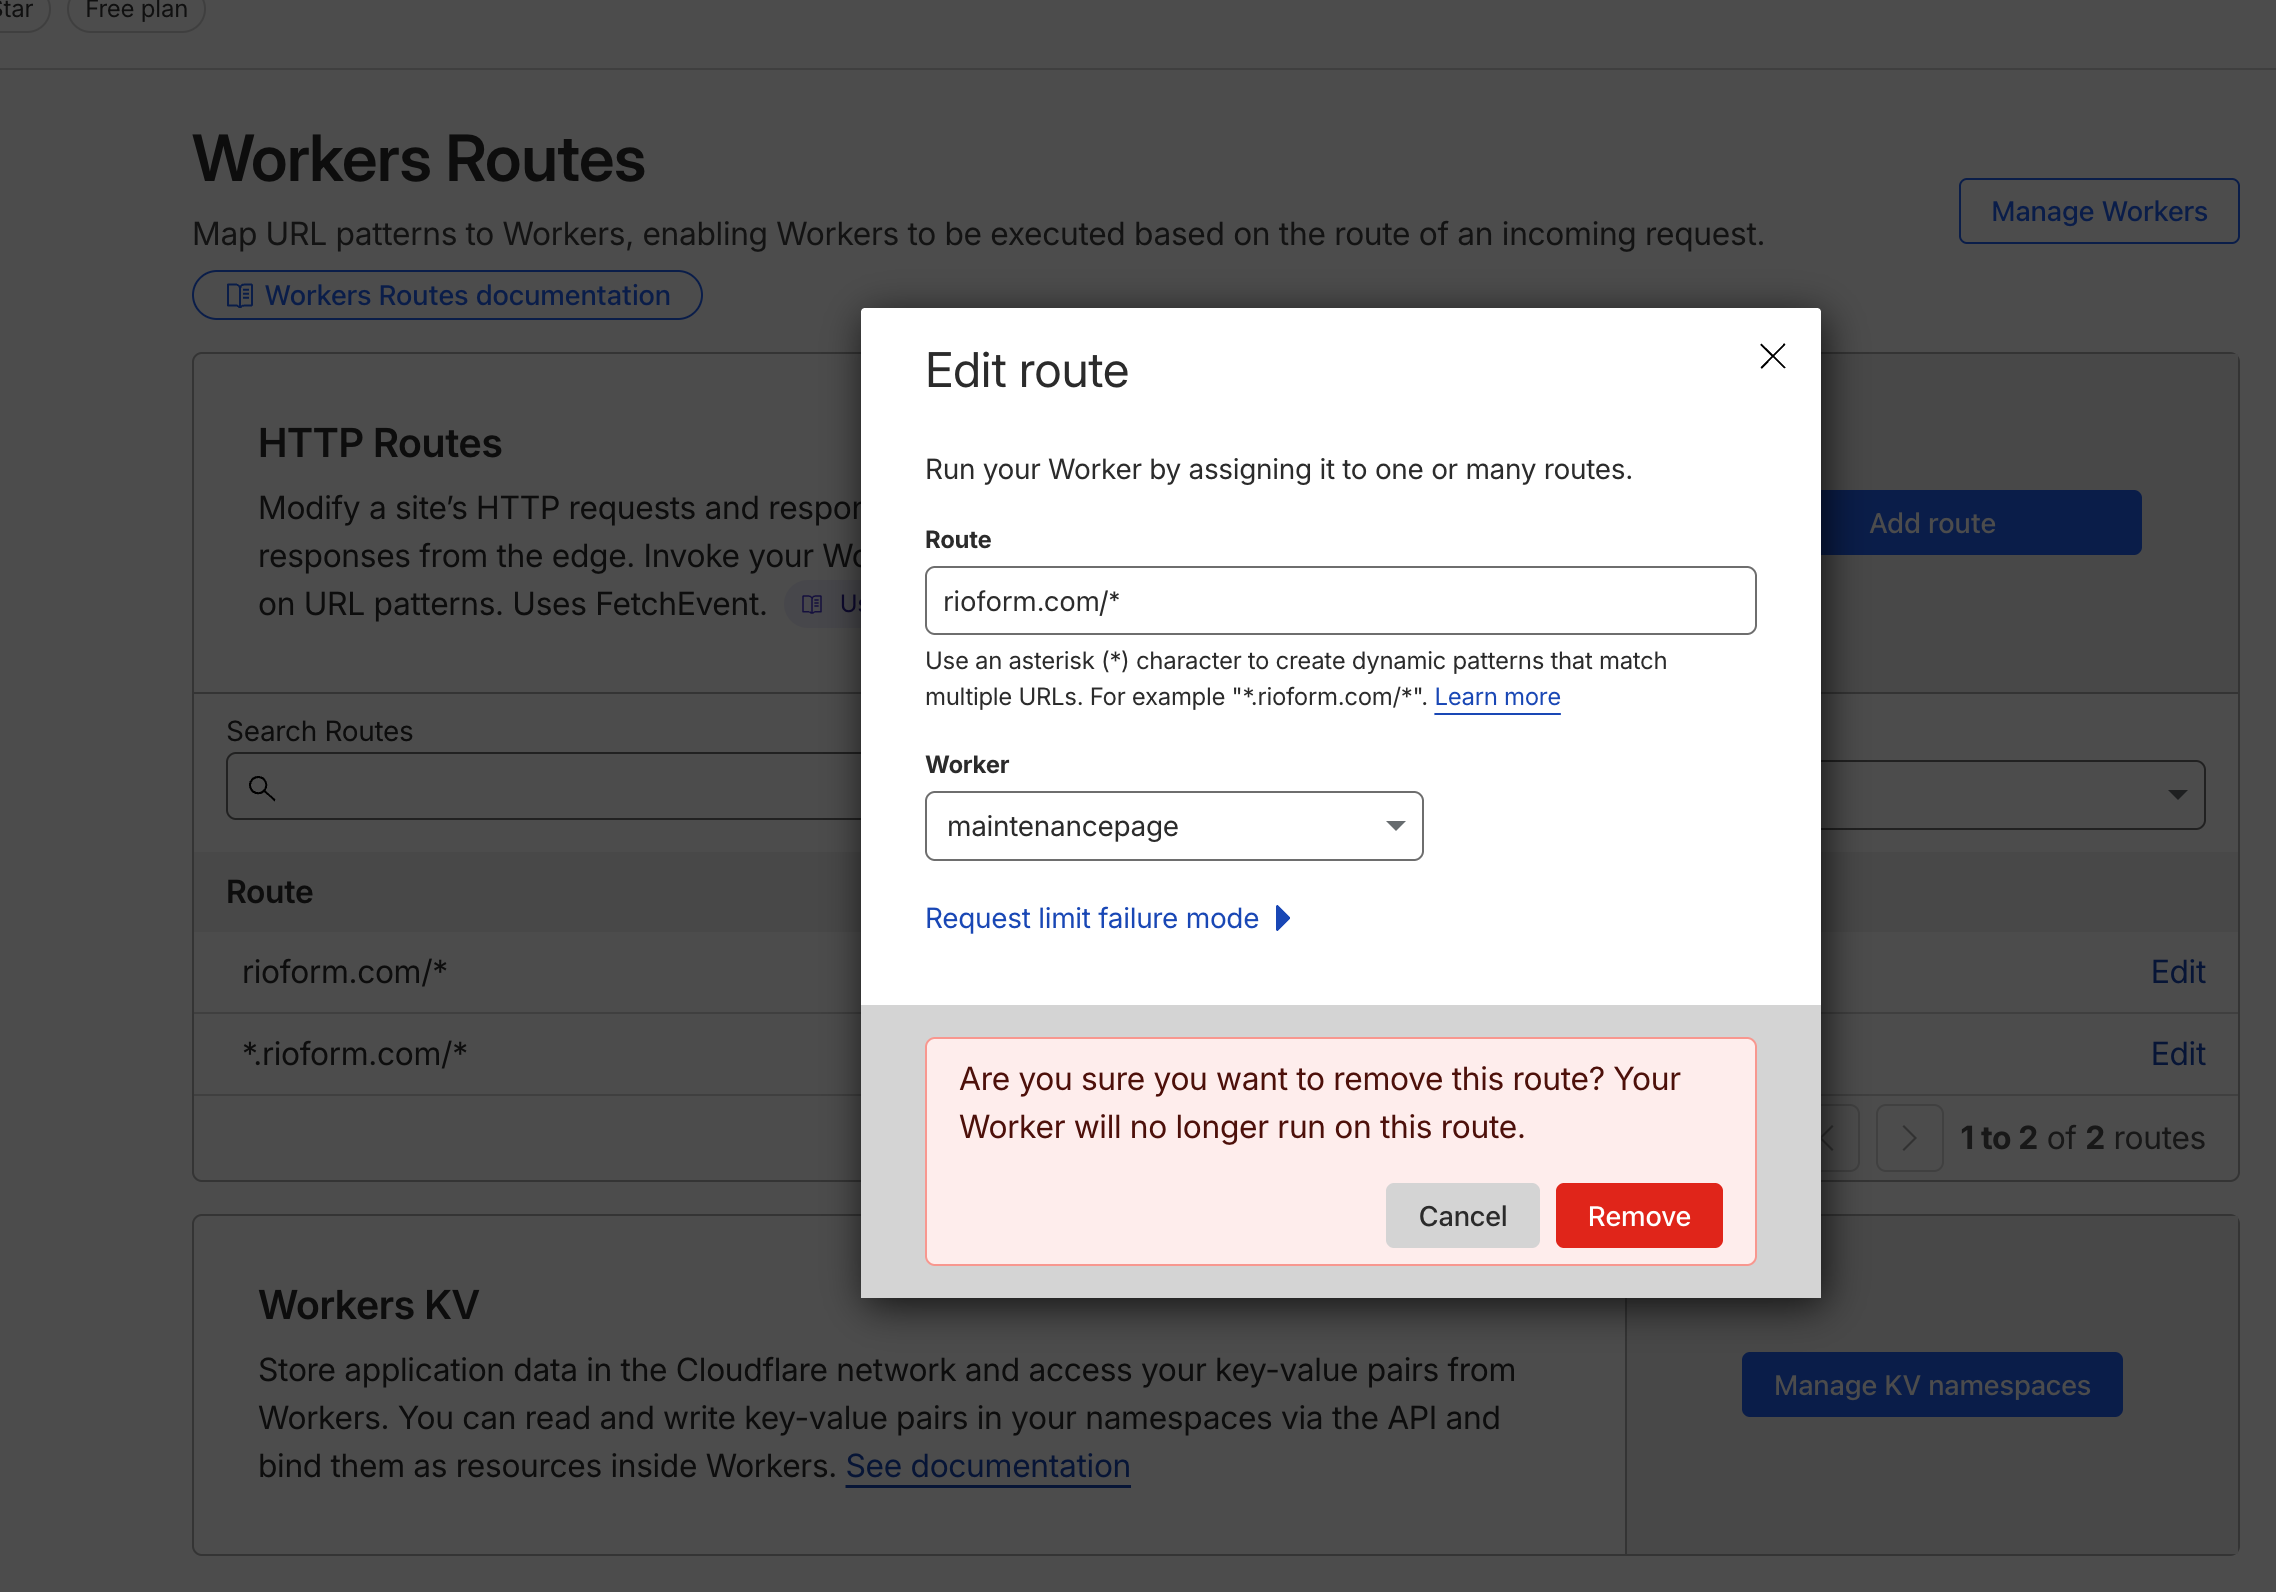
Step 2: Redirect Traffic Temporarily
In Cloudflare → Worker Settings, create a route that directs all incoming traffic from your main domain to the maintenance Worker.
For this setup, we want every request to rioform.com and www.rioform.com to display the maintenance page. Use the following route configuration:
\*.rioform.com/* → https://maintain.rioform.com

rioform.com/* → https://maintain.rioform.com
Fail Mode: Choose Fail Closed (block) to prevent Cloudflare from routing requests back to the origin while the backend is down or scaling.
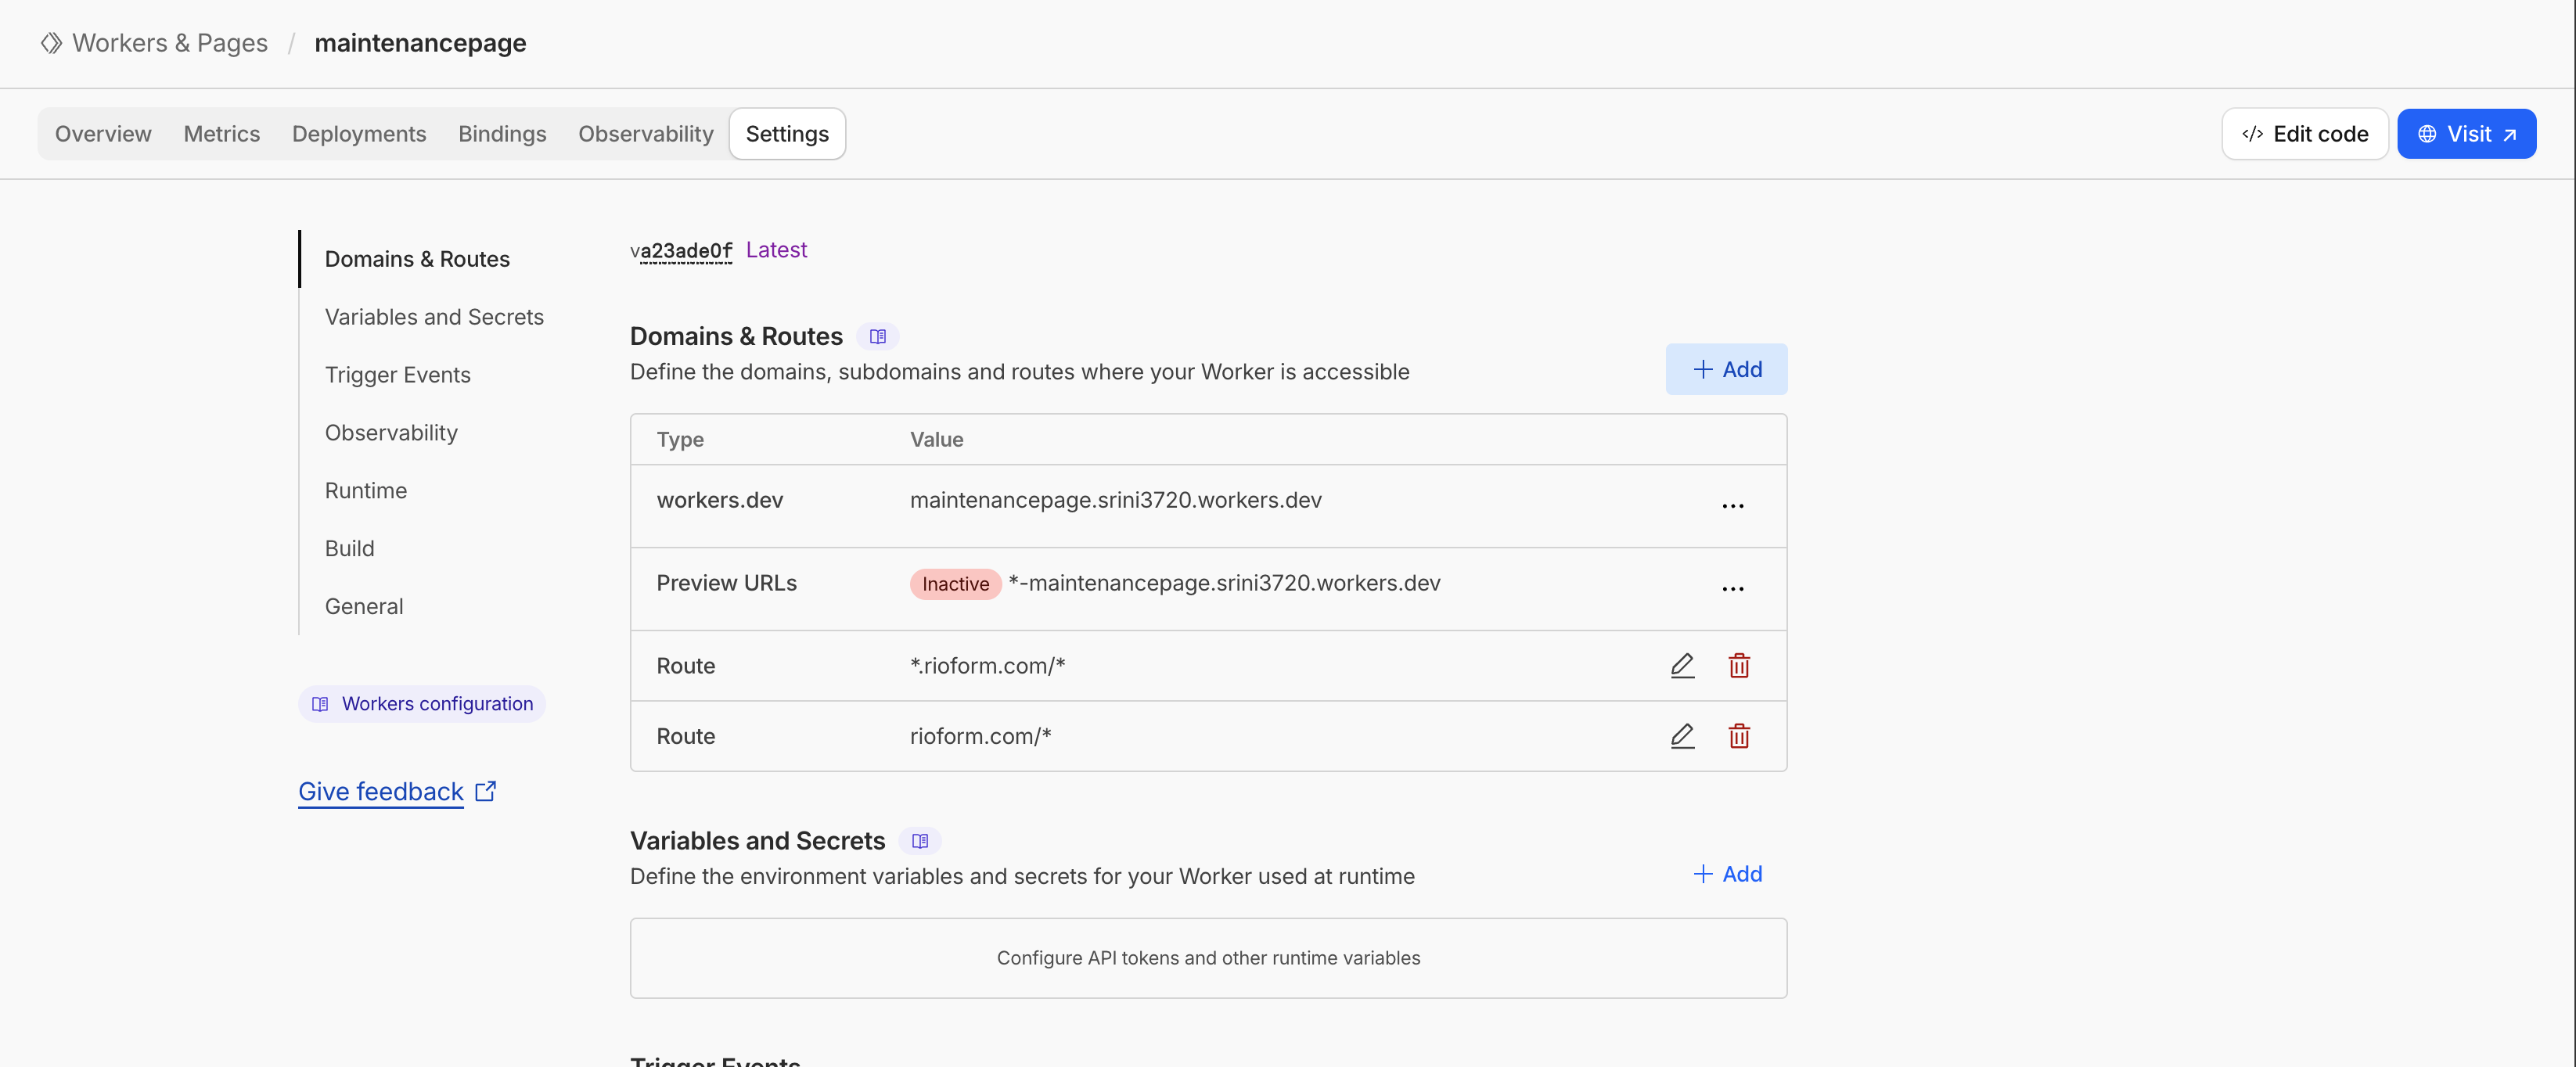
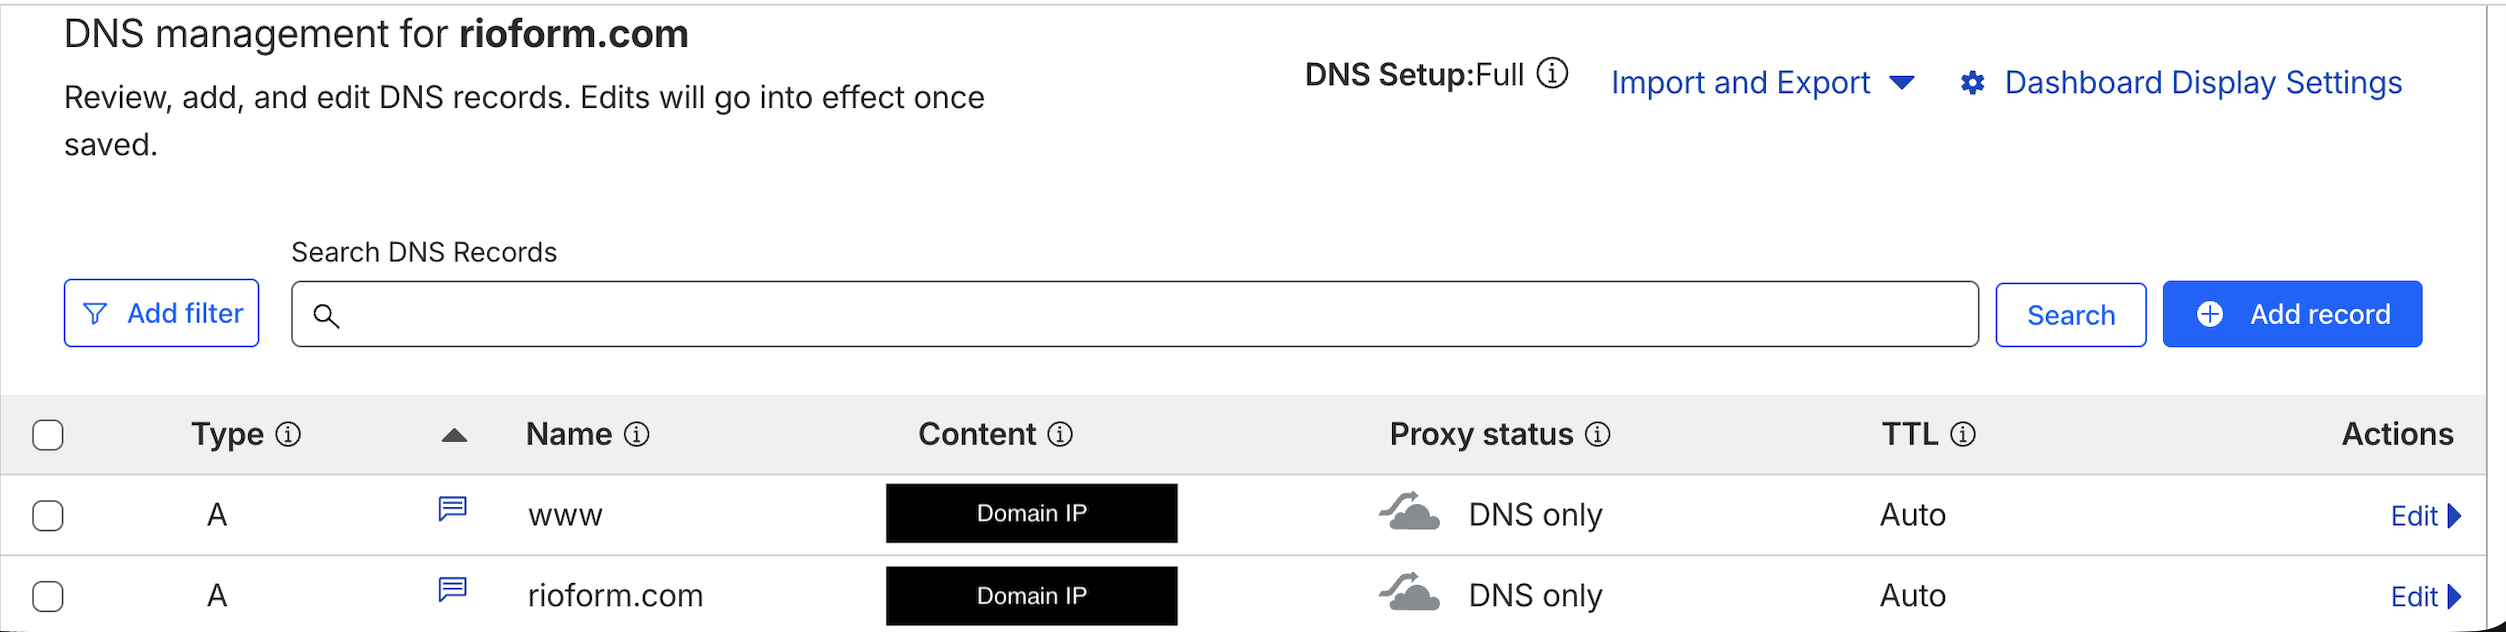
Ensure your domain’s DNS records are Proxied (orange cloud) in Cloudflare.
If the domain isn’t proxied, the Worker will not intercept traffic.
If needed, you can create a temporary A record in Cloudflare DNS pointing to any placeholder IP address.

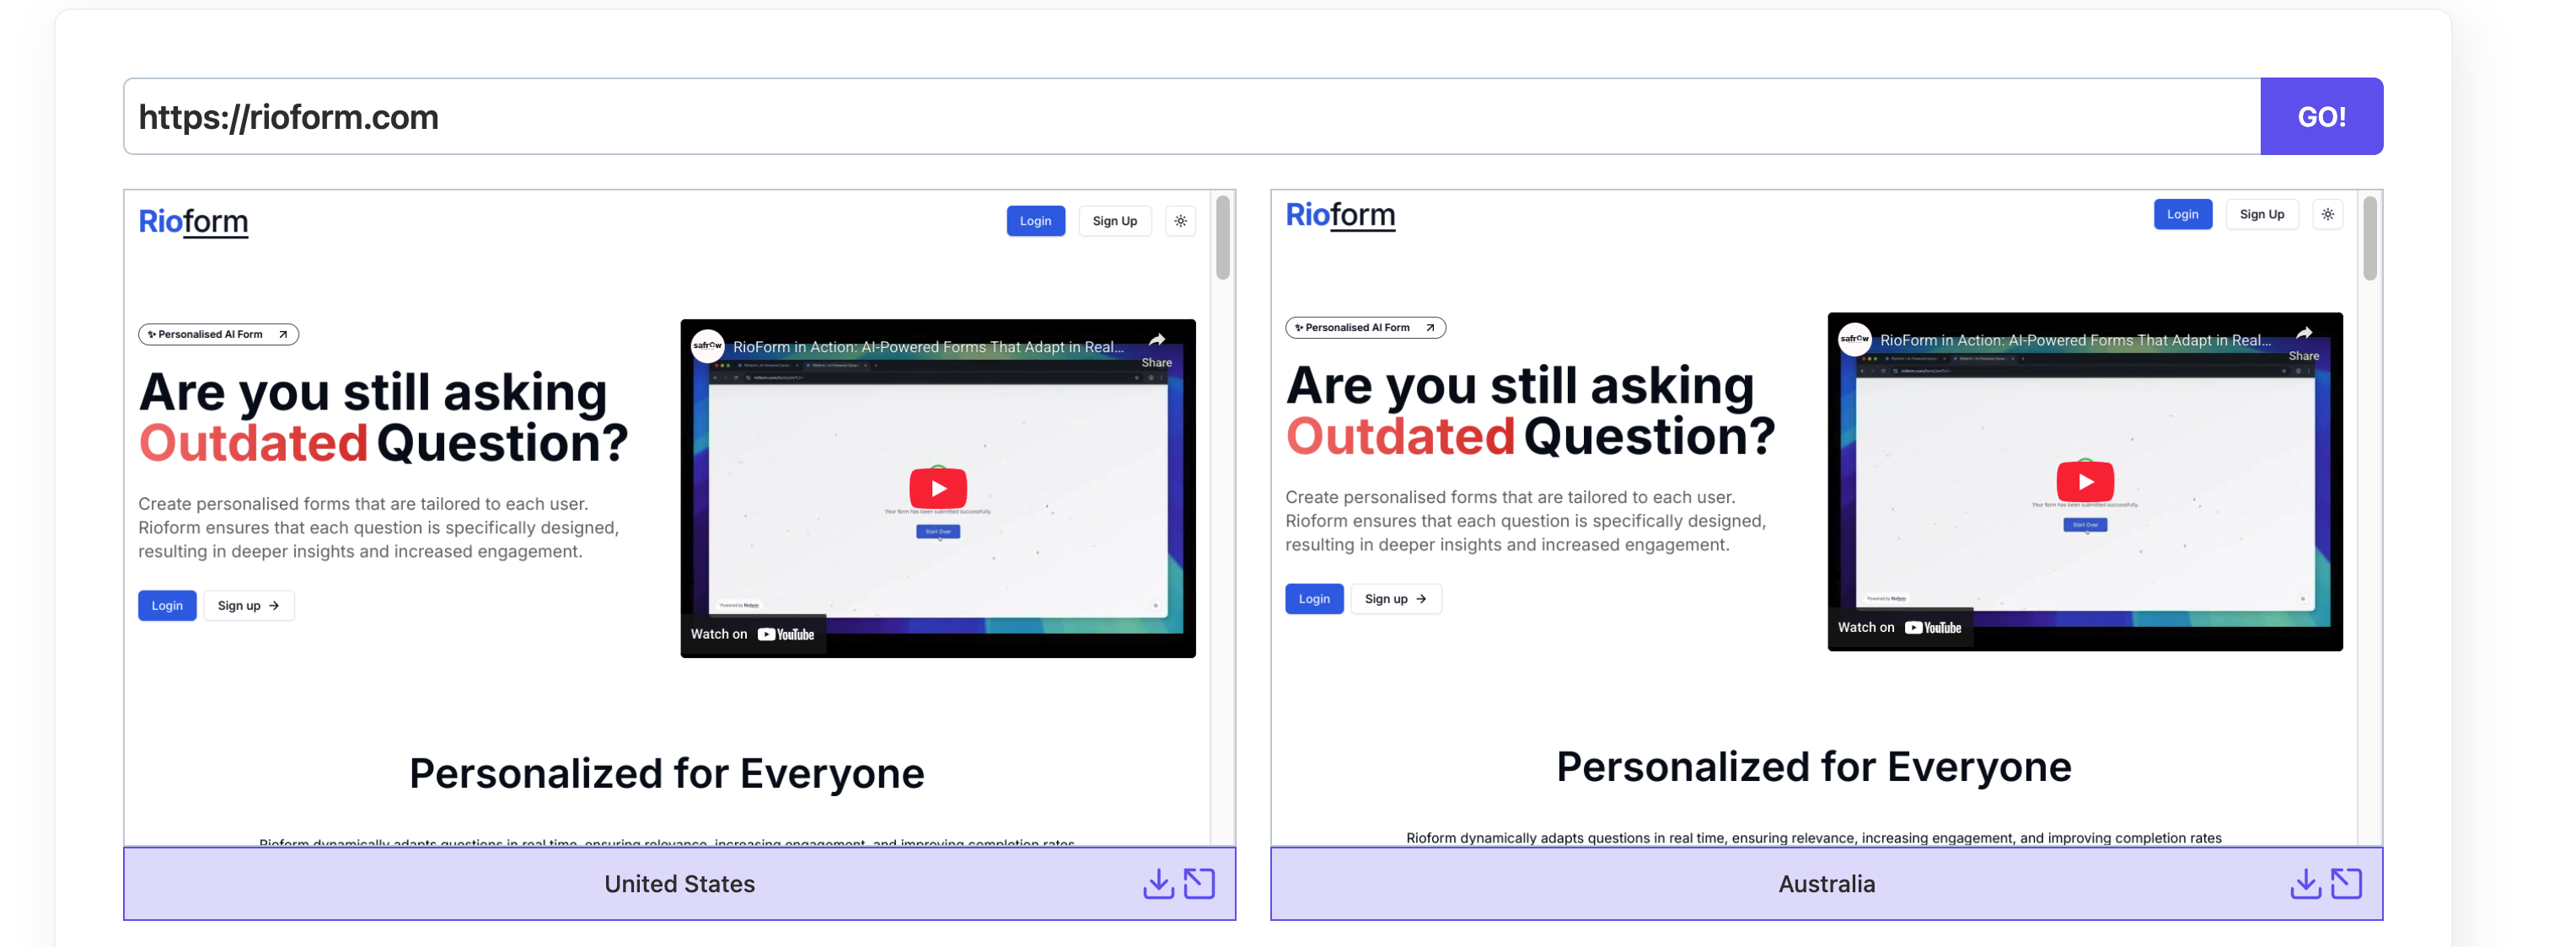
Step 3: Maintenance Page is Live
At this point, all traffic to rioform.com and www.rioform.com will automatically display your custom maintenance page.
Step 4: Revert to Live Mode
After your scaling or migration is complete, update the A record in Cloudflare DNS to point back to your production server’s IP address.
Next, remove or disable the Worker route for your domain.
Your website will now return to live mode with zero downtime during the transition.